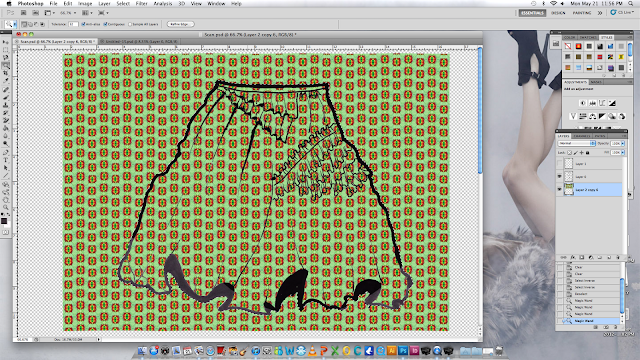
Clean up technical sketch on photoshop ready to drop print in.
- Unlock the layer and use the rectangular marquee tool to delete the area you don't need.
-Make sure all the lines join and enclose the shape so that colour doesn't bleed into other areas. If not use the brush tool to touch up.
-Because you do not have a pure black but a scanned black you need to select the outside then the inverse which allows you to select the outline. Then go to edit>fill>foreground colour> black> to make technical sketch pure black.
Step 2:
Add Print.
- Uncheck contiguous then create a new layer- ALWAYS have the template separate from the print.
- Paste your print and bring the template to the foreground.
-on the print layer, select all free transform—25% (top bar)and keep resizing until you get the desired size. - Need to shrink in incrimints otherwise it will pixilate
-Duplicate layer flip vertical and then merge then bring it down again.> Alt. click. Shift nad drag

-Adjust the skirt rotation so it sits on the garment how you intended
-Render in 3 sepate parts (3 tiers) maybe the waist band
-Warp to make it look like it goes around garment. Edit>transform> warp. You just have to click and drag within the grid to mold the textile to skirt.
-Selcect invers delete background
-Do the next layer
-Add shadow. Paint brush> change foreground to blck> not hard> change opacity after as its on a different layer. Certain parts are darker to eliminate shadow going on two sides of line- magic wand >select black (contiguous off>


No comments:
Post a Comment