Monday 23 April 2012

Assessment 2


  • To create my half drop repeat my layers (Leaf veins and Circular leaf pattern) must stay separate.
  • First I copied both layers into another document so they would be easy to copy, paste, offset and merge without losing any layers or making mistakes. 
  • In my original document, I took note of the Image size (Image> Image Size) and then I made the canvas size double by increasing the width 200% to the left. 
  • The same background is applied to the left side but flipped horizontally, making sure that there are no track marks.
  • Those 3 layers are then merged.
  • The circular maple leaf pattern that was copied can then be pasted to the left side.
  • With this new layer selected I went to Filter> Other> Offset then divided the vertical pixel image size by two and changed the horizontal to 0. I then positioned the pattern to left centre. 
  • The two layers were then merged and defined as a new pattern (Edit> Define Pattern> OK)
  • I opened up a new large document and filled with the new pattern.

AND DONE!!!!!

Brush repeat


  • To create my two brushes I simply cut out (separately) two Maple leaves from my scanned image using the magnetic lasso tool and selected Edit> Define Brush Preset> OK.


  • I then began to create a pattern using the brushes on my Maple Leaf Vein Background. 
  • In one corner I placed the leaves in different, colours, sizes and angles.


  • Taking the scan of my hand drawing of the Maple seed, I removed the white background by selecting Select> Colour Range. 
  • I then changed the size and angle of the seed and positioned multiple seeds around the maple leaves. 
  • Doing the same as the leaf background, I copied and flipped this design around so that it fell into all four corners nicely creating my circular maple leaf pattern. 
  • And the Maple leaf pattern is complete!


Photoshop Manipulation


  • After scanning my Maple leaf in at 300dpi I edited the brightness and contrast and used a 'cutout' filter.


< Cutout filter


  • I then opened a new document with square dimensions and selected Snap to> ALL> View> Rulers to create a guide to work with.
  • Using Edit> Transform> Flip Horizontal (& Flip Vertical) I positioned the image in all four corners so they created a pattern. 
  • I then Merged all layers.
  • To check this would repeat nicely i defined this as a pattern and checked to see if there were any track marks. 
And the background of my pattern using maple leaf is finished!


Autumn Days


Friday 20 April 2012


HALF DROP REPEATS IN PHOTOSHOP
1. Open up your motif. Select> ALL. Edit> Copy
2. Image> Image size. Write  down the pixel measurements
3. Filter> Other> Offset. Ensure that the Wrap around is selected. Divide the vertical pixel image size by two and change the horizontal to 0. Click OK.
4. Image> Canvas size. Change to percent then click the middle box on the left hand size. Change the Width to 200% and leave the Height as 100%.
5. Edit> Paste (original image you first copied). Move the image directly to the right of the first. Flatten the image.
6. Select> All> Edit> Define Pattern> OK.
7. Open a new document. Edit> Fill. Find your new pattern and select OK. 


FULL DROP REPEATS IN PHOTOSHOP
1. Open up your motif
2. Image> Image size. Write  down the pixel measurements
3. Filter> Other> Offset. Divide the horizontal and vertical pixel images sizes by two and enter the new values. Click OK.

4. Fix any track marks using the 'Spot Healing Brush Tool' by dragging the brush in a zig-zag style across the lines. Or You can use the stamp tool by holding down alt and clicking over the line to conceal the track mark. 
5. Select> All> Edit> Define Pattern> OK.
6. Open a new document. Edit> Fill. Find your new pattern and select OK. 


TOSS REPEATS IN PHOTOSHOP

1. Open up motif. Select> All> Edit> Copy. 
2. Open up a new square document. View> Snap to> Layers> View> Snap to> All.
3. View> Rulers. Drag your cursor from the horizontal and vertical ruler until they snap to centre giving you a guide to work with. 
4. Using one of the four sections go to Edit> Paste. Arrange your motif so that it touches one of the top left hand corners. Edit> Transform> Flip Vertical. Place this part in the bottom right hand corner. 
5. Do the same for the top right but flip horizontally. 
6. begin to add in the motif but changing the size and positioning using Edit> Free Transform. Toss these about the square. 
7. Using the Rectangular Marquee Tool select that square. Edit> Define Pattern> OK.
8. Open a new document. Edit> Fill. Find your new pattern and select OK. 
9.Retouching needs to be done using the 'Spot Healing Brush Tool' by dragging the brush in a zig-zag style across the lines. Or You can use the stamp tool by holding down alt and clicking over the line to conceal the track marks. 


Repeat Systems


STRIPE REPEAT

1. Use the rectangle tool to create thin or thick stripes running    vertically down the page.
2. After clicking the move tool, hole alt while click and dragging any stripe across which will repeat it to a new location on the page. 
3. Do this with many Stripe widths and colours. You do not have to cover the whole page.
4. Use the rectangle marquee tool and select a horizontal section of your striped pattern
5. Go to Edit>Define Pattern- name and press 'OK'
6. Go to a new page or the area where you want your pattern to be and then go to Edit> Fill> Use> Pattern> Custom pattern. Your new pattern should be available for selection. Click you pattern and 'Ok' and the whole area should be filled with the striped repeat.


MIRROR REPEAT

1.Fill your background with a colour 
2.Download a stroke-like or watercolour brush from brusheezey
3.In a contrasting colour place one stroke in the top left hand corner.
4.Duplicate this element directly to the right and then flip it horizontally creating a mirror effect. Edit> Transform> Flip Horizontal.
5. Do the same but vertically.
6. Merge layers then duplicate this element by flipping it horizontally or vertically in a way that allows for no visible seams or track marks. 
7. Select a large area that has no track marks using the rectangle marquee tool then select Edit> Define Pattern- name and 'OK'
8.Go to a new page and fill the area with your new pattern. Edit> Fill> Use> Pattern> Custom pattern.
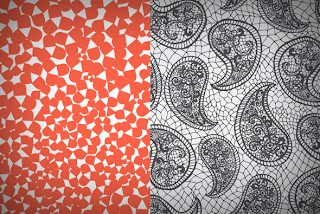
Toss:
Tigerprint. 2011. 'Pattern People Submissions'. Viewed on 21/4/12 <http://tigerprint.typepad.com/tigerprint/opportunities/> 


Half Drop:
TrueUp. 2010. 'Daily Swatch: Pattern Types- Half-Drop Repeat'. Viewed on 21/4/12 <http://www.trueup.net/2010/the-daily-swatch/daily-swatch-pattern-types-half-drop-repeat/>


Brick:
Artlandia .2012. 'Creating Half-Drop and Brick Repeats'. Viewed on 21/4/12 
<http://www.artlandia.com/products/SymmetryWorks/tutorials/lesson3/page2.html>
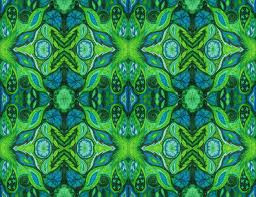
Mirror:
Deviant Art. 2010. 'Minty Leafy Mirror Repeat'. Viewed on 21/4/12 <http://periwinklepaisley.deviantart.com/art/Minty-Leafy-mirror-repeat-154984843>  
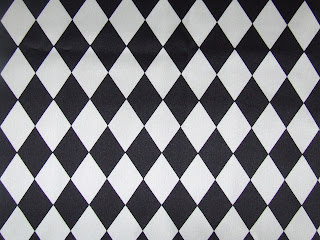
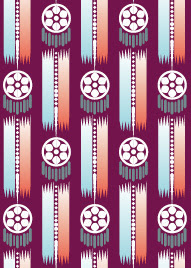
Diamond:
Bartley, K. 2011. 'Diamond Repeat', Digital Diary. Blog. Viewed on 21/4/12 <http://katebartley.blogspot.com.au/2011/04/diamond-repeat.html>
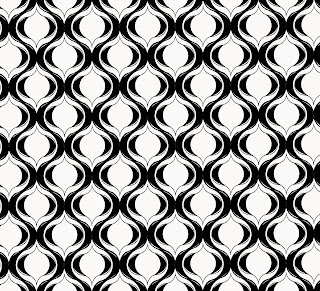
Ogee:
Bartley, K. 2011. 'Ogee Repeat', Digital Diary. Blog. Viewed on 21/4/12 <http://katebartley.blogspot.com.au/>
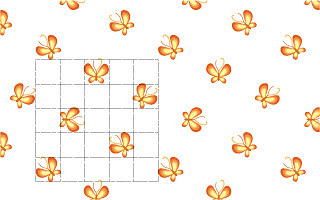
Spot:
Artlandia .2012. 'Spot Repeat'. Viewed on 21/4/12 <http://www.artlandia.com/wonderland/glossary/SpotRepeat.html>

Stripe:
Bartley, K. 2011. 'Striped Repeat', Digital Diary. Blog. Viewed on 21/4/12 <http://katebartley.blogspot.com.au/>

Monday 2 April 2012


The tutorial allowed me to explore how to download and use brushes giving a watercolour effect which is highly effective. I had lots of trouble with placement of the brushes around the face but worked out how to free transform and move layers around to create hair-like strokes. The merging of layers also proved to be difficult as the words blocked out some of my image and i then had to re-touch so there was no definite square shape visible.